Introduction
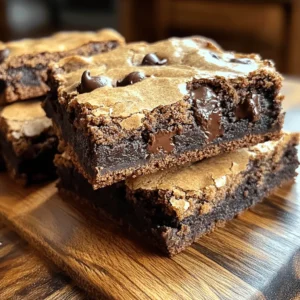
In the world of desserts, few treats can ignite the same level of enthusiasm and joy as brookies. A delightful fusion of brownies and cookies, brookies have taken the dessert scene by storm, capturing the hearts of dessert enthusiasts everywhere. Their rich, fudgy brownie base paired with a soft, chewy cookie top creates a perfect balance of flavors and textures that is hard to resist. Whether you’re a die-hard cookie lover or a brownie aficionado, brookies offer the best of both worlds, making them an irresistible choice for any occasion.
The appeal of brookies goes beyond their delectable taste; they are a testament to culinary creativity. The concept of combining two beloved desserts into one not only simplifies the baking process but also ensures that every bite is a delightful surprise. Imagine sinking your teeth into a chewy cookie layer, only to be met with the rich, moist goodness of a brownie underneath. This unique structure creates a dessert experience that is both satisfying and indulgent, making brookies a popular choice for parties, family gatherings, or simply as a treat for yourself after a long day.
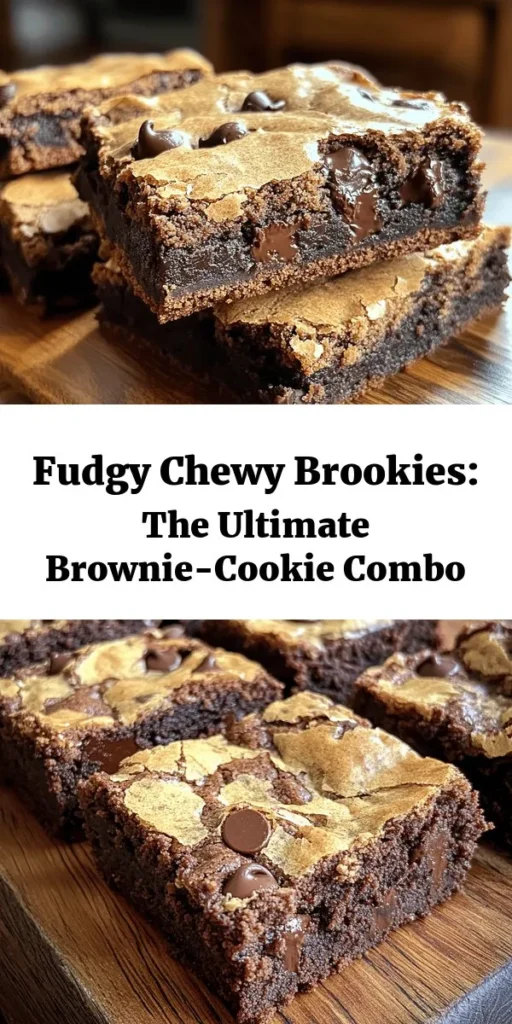
In this article, we will guide you through the process of making the best fudgy chewy brookies. With a perfect balance of ingredients and straightforward instructions, you’ll be able to whip up a batch of these heavenly treats in no time. Let’s dive into the world of brookies and explore what makes them so special, starting with a deeper understanding of this delightful dessert.
Understanding Brookies: A Perfect Dessert Fusion
Brookies, a portmanteau of “brownies” and “cookies,” are a relatively new addition to the dessert landscape, but they have quickly become a favorite among dessert lovers. The origin of brookies can be traced back to the creative minds of home bakers who sought to combine two classic desserts into a singular, mouthwatering creation. While the exact timeline of their invention remains fuzzy, what is clear is that brookies have carved out a niche for themselves in the hearts and stomachs of sweet treat enthusiasts.
To truly understand the allure of brookies, it’s essential to compare the traditional brownie and cookie. Brownies are known for their dense, fudgy texture and rich chocolate flavor, often enjoyed by those who crave deep, chocolatey indulgence. On the other hand, cookies are celebrated for their versatility, with textures ranging from crisp to chewy, and flavors that can be as varied as chocolate chips, oatmeal, and nuts. By merging these two classic desserts, brookies provide a unique experience that satisfies multiple cravings at once.
The appeal of combining brownies and cookies lies not just in the flavor but also in the texture. The fudgy brownie layer serves as a moist, rich foundation, while the cookie layer adds a delightful chewiness that keeps you coming back for more. This dual texture creates an exciting dessert experience, where each bite offers a new surprise. Whether enjoyed warm from the oven or at room temperature, brookies are sure to become a go-to dessert for any occasion.
Ingredients Breakdown
Before we embark on our baking journey, let’s take a closer look at the essential ingredients that make up our fudgy chewy brookies. Understanding the role of each ingredient will not only enhance your baking skills but also ensure that your brookies turn out perfectly every time.
Brownie Layer Ingredients
1. Butter: The foundation of our brownie layer, butter is crucial for achieving that rich, fudgy texture. It adds moisture and flavor, making the brownies incredibly decadent. For the best results, use unsalted butter to control the saltiness of your batter.
2. Sugar: Granulated sugar and brown sugar will both play important roles in the brownie layer. Granulated sugar helps create a crisp top crust, while brown sugar contributes to a chewier texture and adds a hint of caramel flavor.
3. Cocoa Powder: This is the star ingredient that gives our brownies their rich chocolate flavor. High-quality cocoa powder ensures a deep, chocolatey taste that enhances the overall profile of the brookies.
4. Chocolate Chips: Adding semi-sweet or dark chocolate chips to the brownie layer elevates the chocolate flavor and creates pockets of melted chocolate throughout. They add a delightful textural contrast to the fudgy brownie base.
Cookie Layer Ingredients
1. Butter: Just like in the brownie layer, butter is essential for the cookie layer. It contributes to the overall flavor and provides moisture, ensuring the cookies remain soft and chewy.
2. Sugars: The cookie layer typically uses a combination of brown sugar and granulated sugar. Brown sugar adds moisture and chewiness, while granulated sugar helps create a crisp exterior. This perfect balance results in cookies that are both soft and slightly crunchy on the edges.
3. Flour: All-purpose flour is the backbone of the cookie layer. It provides structure, ensuring that the cookies hold their shape while still being tender and chewy.
4. Chocolate Chips or Nuts: Just like in the brownie layer, chocolate chips can be mixed into the cookie batter for added flavor and texture. For those who prefer a little crunch, adding chopped nuts can provide an additional layer of complexity.
By understanding the purpose of each ingredient in both the brownie and cookie layers, you’ll be better equipped to create the ultimate brookies. The combination of fudgy brownie and chewy cookie not only satisfies diverse palates but also allows for endless customization. Now that we’ve covered the essential ingredients, let’s move on to the exciting part: making our brookies!
Step-by-Step Guide to Making Brookies
Preparing Your Baking Environment
Before diving into the baking process, it’s crucial to prepare your baking environment properly. This ensures that everything runs smoothly and that your brookies turn out perfectly.
1. Preheat the Oven: Start by preheating your oven to 350°F (175°C). This step is vital, as placing your batter into a properly heated oven helps the brookies rise and set correctly.
2. Prepare the Baking Pan: Line an 8×8-inch square baking pan with parchment paper, allowing some overhang on the sides for easy removal later. You can also grease the pan with butter or cooking spray to prevent sticking.
3. Gather Your Tools: For best results, gather the following tools:
– Mixing bowls (preferably one for the brownie layer and one for the cookie layer)
– A whisk or electric mixer for blending
– A spatula for folding and spreading the batter
– Measuring cups and spoons for accuracy
– A rubber spatula or wooden spoon for mixing
Having everything ready before you start will make the process much more enjoyable and efficient.
Crafting the Brownie Layer
The first step in making your fudgy chewy brookies is crafting the brownie layer. Follow these detailed instructions to ensure your brownie layer is rich, fudgy, and full of chocolate flavor.
1. Melt the Butter: In a medium saucepan over low heat, melt the unsalted butter. Stir occasionally to prevent burning. Once melted, remove the saucepan from heat and let it cool slightly.
2. Mix in Sugars: Add both granulated sugar and brown sugar to the melted butter, stirring until well combined. The heat from the butter helps dissolve the sugars, resulting in a smooth mixture.
3. Add Cocoa Powder: Sift in the cocoa powder to avoid any lumps. Mix until fully incorporated. This step is crucial for achieving a velvety brownie batter.
4. Incorporate Eggs: Allow the mixture to cool to room temperature before adding the eggs. If the mixture is too hot, it may cook the eggs. Once cooled, add the eggs one at a time, whisking until each is fully incorporated before adding the next.
5. Combine with Dry Ingredients: In a separate bowl, combine all-purpose flour and a pinch of salt. Gradually fold the flour mixture into the wet ingredients, being careful not to overmix. Optional: If desired, fold in chocolate chips for added richness.
By following these steps carefully, you’ll create a smooth and luscious brownie batter that will serve as the foundation for your brookies. The rich, fudgy texture of the brownie layer will perfectly complement the chewy cookie layer, resulting in a dessert that is both satisfying and indulgent.
Stay tuned as we continue this delicious journey into making the best fudgy chewy brookies, where we’ll tackle the cookie layer and bring this delightful dessert to life!
Creating the Cookie Layer
The cookie layer of your browkies is essential for achieving that perfect combination of chewy and fudgy texture. To create this delicious layer, we’ll utilize the creaming method, which helps incorporate air into the dough, giving it a light and fluffy consistency.
Creaming Method for Cookie Dough
Start by combining softened butter and granulated sugar in a mixing bowl. Use an electric mixer on medium speed to cream the two together until the mixture becomes pale and fluffy, typically around 2-3 minutes. The key here is to beat the butter and sugar until they are well combined, but not overly mixed. Overmixing can lead to a dense cookie layer, which could detract from the overall texture of your browkies.
Once the butter and sugar have reached the desired consistency, add in your eggs one at a time, mixing well after each addition. This will help to maintain the airiness of the dough. Next, gently fold in the dry ingredients—flour, baking soda, and a pinch of salt—until just combined. It’s crucial to avoid overmixing at this stage; you want to see a few visible streaks of flour before adding your chocolate chips or nuts.
Incorporating Chocolate Chips or Nuts
When it comes to adding chocolate chips or nuts, do so gently. Use a spatula to fold them into the dough until evenly distributed. This not only ensures an even texture but also maintains the integrity of the cookie layer. Semi-sweet chocolate chips are a classic choice, but feel free to experiment with dark chocolate chunks or even white chocolate for a unique twist. If you prefer a little crunch, consider adding chopped walnuts or pecans.
Layering and Baking
Now that you have your brownie batter and cookie dough ready, it’s time to layer them for the perfect browkies.
Techniques for Layering Cookie Dough Over Brownie Batter
Start by pouring the brownie batter into a greased 9×13-inch baking pan, spreading it evenly across the bottom. Once the brownie layer is in place, you can add the cookie dough. Here’s where you can get creative. Using a spoon or an ice cream scoop, drop dollops of cookie dough over the brownie batter. Aim for an even distribution, but don’t worry about perfection; the dough will spread as it bakes, creating a beautiful marbled effect.
Using a spatula or the back of a spoon, gently spread the cookie dough to cover the brownie layer, ensuring it reaches the edges of the pan. The goal is to create a seamless layer that blends together during baking, resulting in those chewy, fudgy browkies we all love.
Insights into the Baking Process
Bake your layered creation in a preheated oven at 350°F (175°C) for 25-30 minutes. To check for doneness, insert a toothpick into the center of the pan. If it comes out with moist crumbs (not wet batter), it’s time to remove the browkies from the oven. Remember that the browkies will continue to cook slightly from residual heat once out of the oven, so resist the urge to leave them in for too long. Overbaking can lead to dry browkies, which is the last thing we want!
Cooling and Serving Your Browkies
Importance of Cooling Time for Texture
Patience is key when it comes to cooling your browkies. Allow them to cool in the pan for at least 20-30 minutes before attempting to cut them. This cooling time is crucial for achieving that perfect texture. If you cut them too soon, the layers may not set properly, leading to a gooey mess instead of those lovely fudgy squares we’re aiming for.
Suggestions for Cutting and Serving Sizes
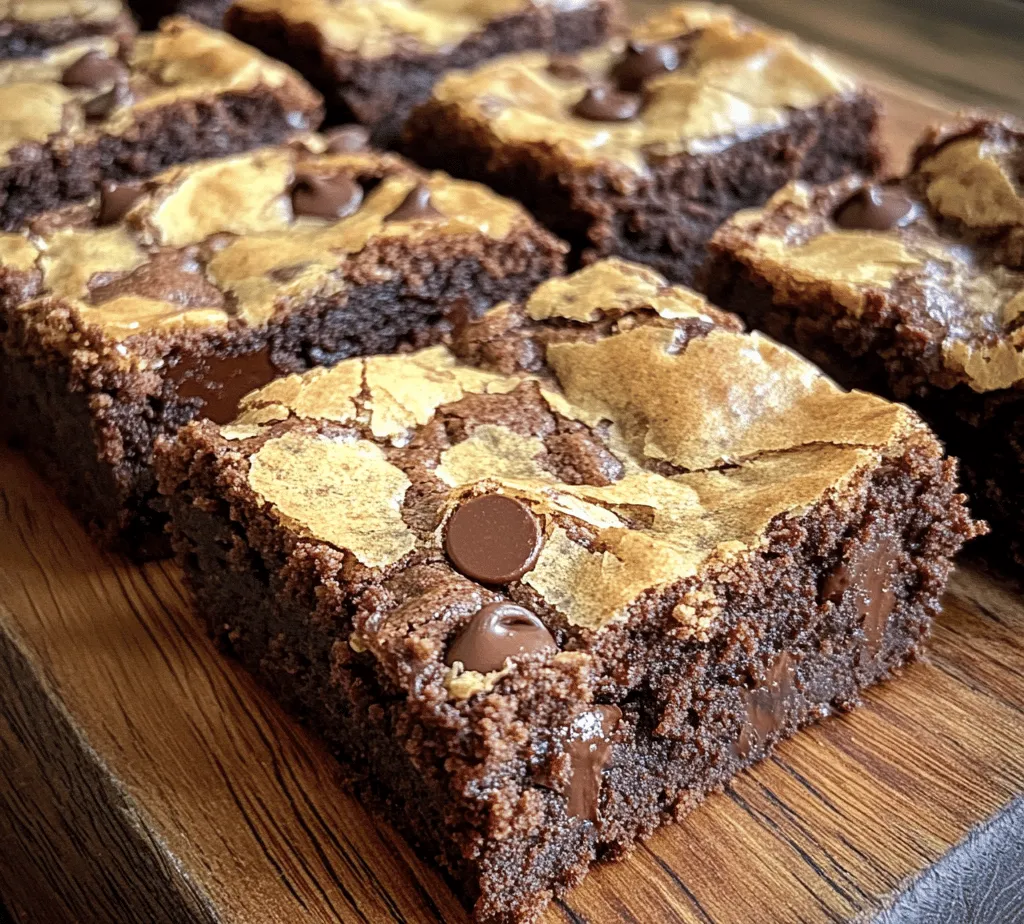
Once cooled, run a knife around the edges of the pan to loosen the browkies. Place them on a cutting board and slice them into squares or rectangles. A sharp knife will give you clean cuts, enhancing the presentation of your browkies. Depending on your preference, you can cut them into larger squares for a decadent treat or smaller portions for sharing.
Ideas for Pairing with Ice Cream or Other Accompaniments
For an indulgent dessert, serve your browkies warm with a scoop of vanilla ice cream on top. The combination of warm, fudgy chocolate and cold, creamy ice cream is simply irresistible. You can also drizzle some chocolate or caramel sauce over the top for an extra touch of sweetness. For a twist, consider pairing your browkies with fresh berries or a dollop of whipped cream for a lighter option.
Why These Browkies Are a Must-Try
Discussion of Flavor and Texture Profiles
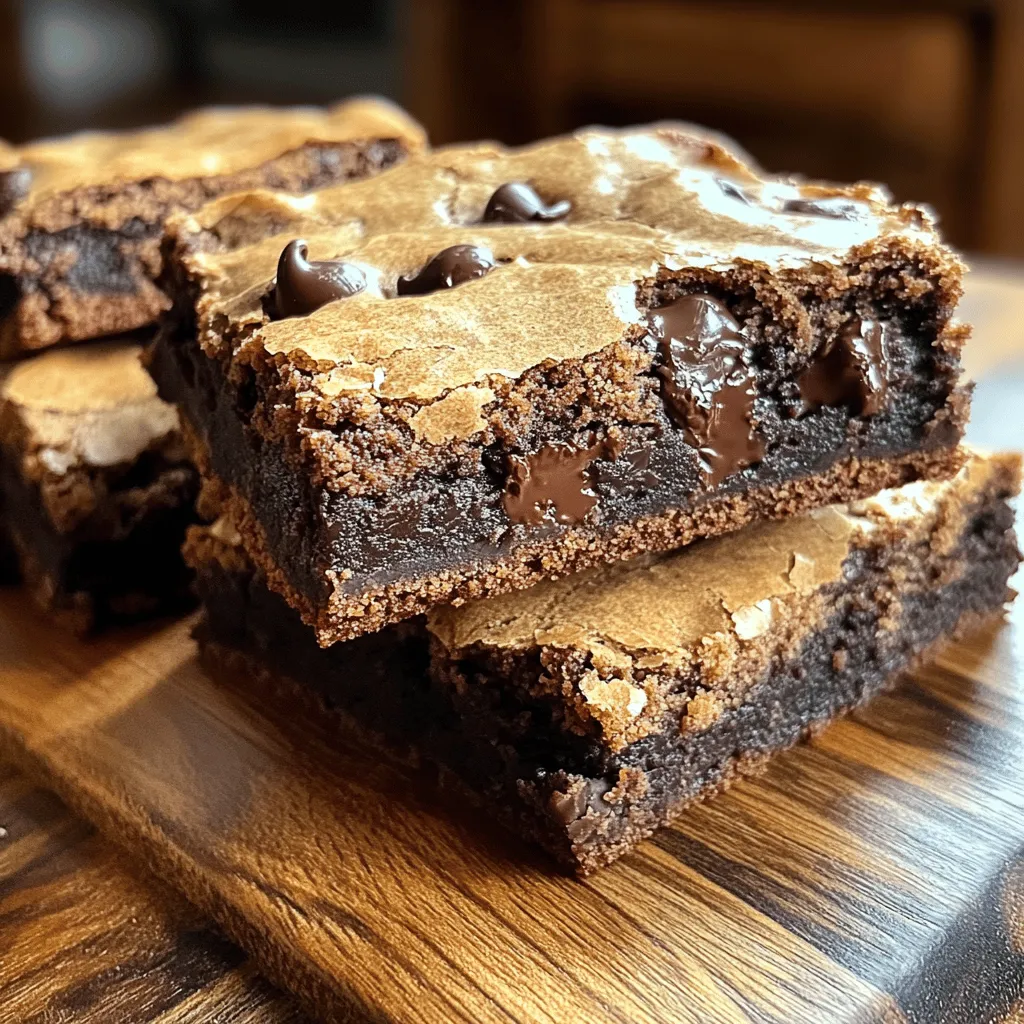
These fudgy chewy browkies are the ultimate treat for dessert lovers. Each bite delivers a delightful contrast between the rich, chocolatey brownie layer and the chewy, sweet cookie layer. The melty chocolate chips create pockets of gooey goodness, making these treats utterly irresistible. The balance of flavors—sweetness from the cookie dough and richness from the brownies—ensures that everyone will be coming back for more.
Testimonials or Quotes from Those Who Have Tried the Recipe
Don’t just take my word for it; here’s what some of my friends and family have said after trying these browkies:
– “These browkies are a game-changer! The chewy cookie layer complements the fudgy brownies perfectly.” – Sarah, avid baker.
– “I brought these to a potluck, and they disappeared within minutes. Everyone was raving about them!” – Mark, dessert enthusiast.
The Versatility of Browkies for Various Occasions
Whether it’s a birthday party, a family gathering, or just a cozy night in, these browkies fit right in. Their dual-layered nature makes them a unique dessert that stands out from traditional cookies or brownies. They’re perfect for sharing, and you can easily adjust the recipe to include seasonal flavors or add-ins to suit any event.
Storing and Reheating Browkies
Best Practices for Storing Browkies to Maintain Freshness
To keep your browkies fresh, store them in an airtight container at room temperature. They will typically stay delicious for about 4-5 days. If you want to extend their shelf life, consider refrigerating them, which can keep them fresh for up to a week. Just be sure to let them come back to room temperature before serving, as this will enhance the texture and flavor.
Tips on Reheating for Optimal Taste and Texture
If you have any leftovers (which is rare, but it happens!), you can easily reheat your browkies in the microwave for about 10-15 seconds. This will warm them up and make the chocolate chips slightly melty again. Alternatively, you can warm them in a preheated oven at 350°F (175°C) for about 5 minutes. This will help restore their fresh-baked texture, making them taste just as good as the first day.
Nutritional Information
Overview of Calories and Key Nutrients per Serving
While these browkies are undeniably a treat, it’s good to be aware of the nutritional information. Each serving (one square) contains approximately:
– Calories: 250
– Total Fat: 12g
– Saturated Fat: 7g
– Cholesterol: 50mg
– Sodium: 150mg
– Total Carbohydrates: 34g
– Dietary Fiber: 1g
– Sugars: 20g
– Protein: 3g
Discussion on Modifications for Dietary Preferences
For those with dietary restrictions, browkies can be modified to accommodate different needs. For a gluten-free version, substitute regular flour with a gluten-free all-purpose blend. Additionally, you can use coconut oil instead of butter for a dairy-free option, and opt for dairy-free chocolate chips to make them fully vegan. These adjustments will maintain the flavor while catering to various dietary preferences.
Conclusion
In summary, making and enjoying fudgy chewy browkies is a delightful experience that combines the best elements of cookies and brownies. From the rich, chocolatey flavor to the chewy texture, these treats are sure to satisfy any sweet tooth. Embrace the baking process, get creative with your flavor combinations, and enjoy sharing these delicious browkies with loved ones. Whether you’re celebrating a special occasion or simply indulging in a sweet treat, these browkies are a must-try. Happy baking!