

Introduction
Are you ready to indulge in a treat that combines the beloved flavors of chocolate and cream in a convenient, bite-sized form? Meet Oreo Bliss Bites—an irresistible no-bake dessert that has taken the culinary world by storm. These delightful morsels are not only a feast for the taste buds but also incredibly easy to whip up, making them a favorite for both novice and experienced bakers alike. With just a handful of ingredients and minimal effort, you can create a dessert that’s perfect for any occasion, whether it’s a birthday party, a holiday gathering, or a simple weeknight treat.
What makes Oreo Bliss Bites especially appealing is their versatility. You can adapt them to suit your preferences and the event at hand, whether you want to make them festive with colorful sprinkles or keep them classic with just a chocolate coating. The no-bake aspect ensures that you don’t have to heat up the kitchen, allowing you to enjoy a delicious treat without the fuss of traditional baking. So, let’s dive deeper into what makes these delights so special and how you can create them in your very own kitchen.
Understanding Oreo Bliss Bites
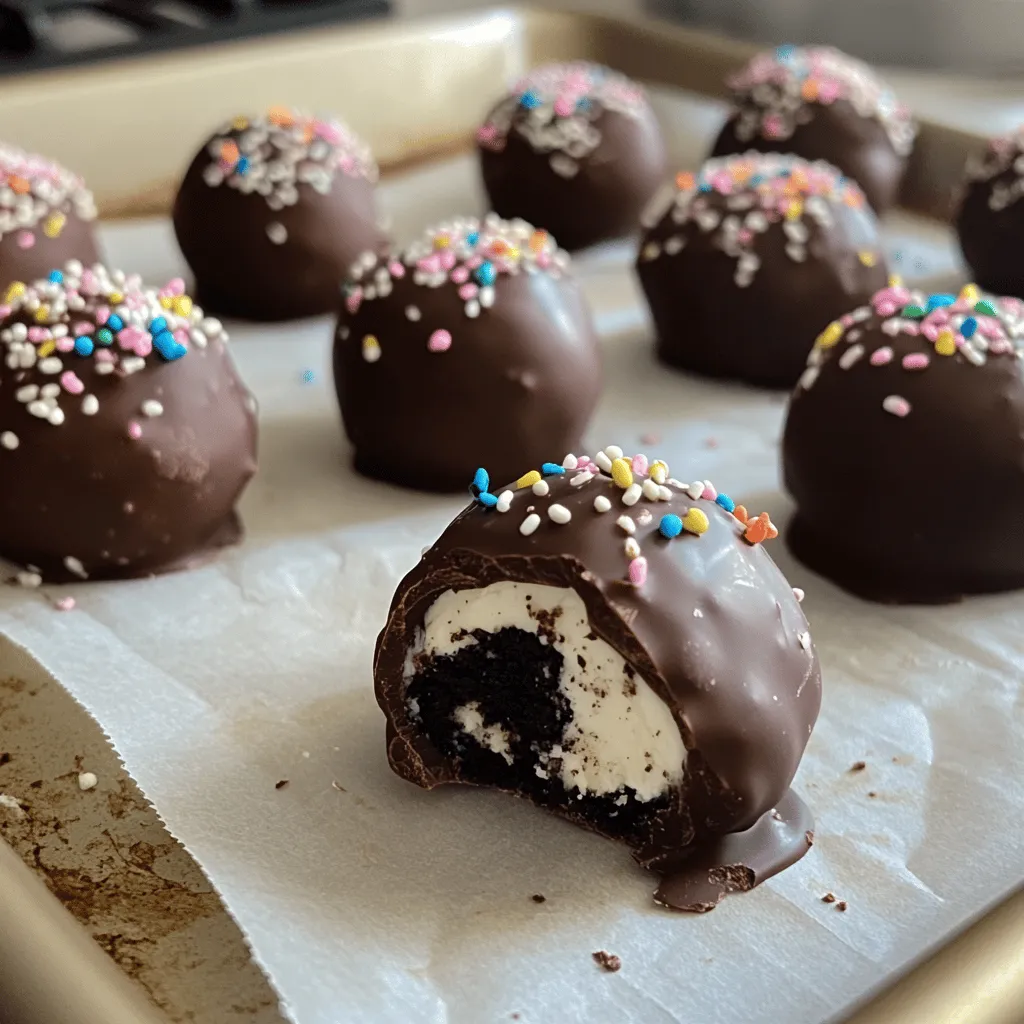
Oreo Bliss Bites are a celebration of flavor and texture. At their core, these delicious bites combine crushed Oreo cookies with cream cheese, resulting in a rich and creamy filling that captivates the palate. The balance of the sweet and slightly bitter chocolate from the Oreos, paired with the tangy cream cheese, creates a harmonious flavor profile that is simply irresistible.
In recent years, there has been a noticeable shift towards no-bake recipes in modern cooking. Busy lifestyles and a desire for quick yet satisfying desserts have made no-bake options increasingly popular. Oreo Bliss Bites embody this trend perfectly, allowing anyone to create a decadent treat without the need for an oven. Whether you’re hosting a party or just looking to satisfy a sweet craving, these bites are the perfect solution.
Ingredient Breakdown
Creating Oreo Bliss Bites requires only a few essential ingredients, each playing a crucial role in the final product:
– Oreo Cookies: As the star of the recipe, the classic Oreo cookies provide the base flavor and texture. Their crunchy exterior and creamy filling meld together to form the delicious core of the bliss bites.
– Cream Cheese: This ingredient acts as the creamy complement to the Oreos. When blended, cream cheese adds a smooth richness that balances the sweetness of the cookies, making every bite a delight.
– Chocolate Chips: Used for coating the bliss bites, chocolate chips add a layer of richness and decadence. They can be melted for dipping, creating a beautiful outer layer that complements the inner filling.
– Coconut Oil: While optional, adding a bit of coconut oil to the melted chocolate can enhance the smoothness and sheen of the coating. It helps the chocolate coat more evenly and adds a subtle hint of coconut flavor.
In addition to these core ingredients, you have the option to dress up your Oreo Bliss Bites with some fun toppings:
– Sprinkles: Perfect for adding a pop of color and a festive touch, sprinkles can make your bites visually appealing and even more fun to eat.
– Crushed Oreos: For those who can’t get enough of the Oreo flavor, sprinkling crushed Oreos on top of the chocolate coating adds an extra crunch and enhances the overall experience.
Step-by-Step Instructions
Now that we’ve covered the ingredients, let’s walk through the process of making Oreo Bliss Bites. Follow these detailed steps to ensure your bites turn out perfectly every time:
Crushing the Oreos
The first step in creating your Oreo Bliss Bites is to crush the Oreo cookies. This can be done in a few different ways, depending on what tools you have available:
1. Food Processor: The easiest and most efficient way to crush Oreos is by using a food processor. Simply add the cookies to the bowl and pulse until they reach a fine crumb consistency. This method ensures even crushing and saves time.
2. Zip-top Bag and Rolling Pin: If you don’t have a food processor, you can place the Oreos in a zip-top bag, seal it tightly, and use a rolling pin to crush them. This method gives you a little more control over the texture, allowing you to leave some larger chunks if you prefer.
3. Manual Crushing: If you’re looking for a workout, you can crush the cookies by hand, placing them in a bowl and using the back of a spoon to smash them. This requires a bit more effort but is perfectly doable.
Regardless of the method you choose, aim for a fine crumb texture, as this will help the bites hold together better.
Mixing with Cream Cheese
Once your Oreos are crushed, it’s time to mix them with the cream cheese. For this step, you will want the cream cheese to be at room temperature to ensure an easy blending process. Here’s how to proceed:
1. Combine Ingredients: In a mixing bowl, add the crushed Oreos and the softened cream cheese. Use a spatula or a hand mixer to combine the two until they are fully integrated. The mixture should be thick and hold its shape.
2. Mix Thoroughly: Be sure to scrape down the sides of the bowl to ensure all the Oreo crumbs are well incorporated into the cream cheese. The goal is to achieve a uniform mixture where every bite will have the perfect balance of flavors.
Forming the Balls
With the Oreo and cream cheese mixture ready, it’s time to form your bliss bites. This step is crucial for achieving uniformity and ensuring each bite is just right:
1. Scoop the Mixture: Using a cookie scoop or a spoon, take a small amount of the mixture—about one tablespoon is a good size for each bite.
2. Roll into Balls: Roll the mixture between your palms to form a smooth ball. This process helps compact the ingredients together, ensuring they hold their shape once refrigerated.
3. Uniform Size: To achieve a consistent size, you may want to weigh each ball or measure them out using a scoop. This way, everyone will get the same delicious experience when they bite into your creations.
Once you have formed all the balls, place them on a baking sheet lined with parchment paper. This will prevent them from sticking and make the next steps easier.
With these initial steps completed, you are well on your way to creating a batch of Oreo Bliss Bites that will impress your family and friends. Stay tuned for the next part of this article, where we will explore the chocolate coating process and the optional toppings that can take your bites to the next level.

Chilling the Mixture: Importance of Firmness for Coating
Once you’ve combined your crushed Oreo cookies and cream cheese into a smooth mixture, it’s crucial to chill it before proceeding. Chilling serves two primary purposes: it allows the flavors to meld together, enhancing the overall taste, and it firms up the mixture, making it easier to roll into perfect balls. The ideal chilling time is about 30 minutes in the refrigerator. This step is non-negotiable; if the mixture is too soft, it will be challenging to coat them in chocolate later. While you wait, you can prepare your workspace and gather the necessary materials for the next steps.
Melting the Chocolate: Techniques for a Smooth Finish
The key to a beautiful chocolate coating lies in how you melt the chocolate. You have a couple of options: the microwave or a double boiler. If you choose the microwave, place your chocolate in a microwave-safe bowl and heat it in 30-second intervals, stirring in between to prevent overheating. This ensures even melting. Alternatively, a double boiler method involves placing chocolate in a heatproof bowl set over a pot of simmering water. Stir continuously until the chocolate is completely melted and smooth.
For the best results, consider using high-quality chocolate, as it will melt better and give your Oreo Bliss Bites a rich flavor. You can also add a tablespoon of coconut oil or vegetable shortening to the chocolate to help achieve a thinner consistency, making it easier to coat the balls evenly.
Coating the Balls: Best Practices for Even Coverage
Once your mixture is chilled and your chocolate is melted, it’s time for the fun part — coating the Oreo balls! Using a fork or a toothpick, dip each chilled ball into the melted chocolate, allowing any excess to drip off. For even coverage, you can use a toothpick to help maneuver the balls into the chocolate, making sure they are fully coated.
To ensure a smooth finish, allow the chocolate to set slightly before placing the coated balls on a parchment-lined baking sheet. If you want a thicker coating, you can dip them a second time after the first layer has set. This will give your Oreo Bliss Bites an indulgent layer of chocolate that perfectly complements the creamy interior.
Decorating: Ideas for Personalization
Take your Oreo Bliss Bites to the next level with some creative decorating ideas. After coating them in chocolate, consider drizzling some melted white chocolate over the top for a beautiful contrast. You can also sprinkle crushed Oreos or colorful sprinkles on top while the chocolate is still wet, adding a fun and festive touch.
For seasonal occasions, you can color your chocolate using food-safe dyes to match the theme of your event. For example, using red and green for Christmas or pastel colors for Easter can add a personal flair. If you are feeling adventurous, consider rolling the balls in finely chopped nuts, shredded coconut, or crushed pretzels for an added texture and flavor twist.
Final Chilling: The Significance of Allowing the Chocolate to Set
After decorating, it’s essential to let your Oreo Bliss Bites chill again to firm up the chocolate coating. Place them back in the refrigerator for at least 15 minutes. This step not only ensures that the chocolate hardens properly but also helps the flavors meld together. Once set, they are ready to be enjoyed or stored for later.
Nutritional Information
When it comes to enjoying treats like Oreo Bliss Bites, understanding the nutritional content is important. Each bite-sized ball contains around 100-120 calories, depending on the specific ingredients used. The primary components, Oreos and cream cheese, contribute to their caloric content, with Oreos providing sugar and carbohydrates, while cream cheese adds fat and protein.
For those mindful of dietary restrictions, there are potential modifications to consider. Gluten-free Oreos are available, making this recipe suitable for those with gluten sensitivities. You can also use low-fat cream cheese or vegan cream cheese alternatives to reduce the fat content. Furthermore, consider portioning them into smaller bites to keep indulgence in check while still enjoying these delightful treats.
Serving Suggestions
Oreo Bliss Bites are incredibly versatile and can be served at various occasions. Here are some ideas:
– Birthday Parties: Their fun, bite-sized nature makes them a hit with kids and adults alike. You can even customize them with sprinkles or colorful coatings to match the party theme.
– Holiday Gatherings: These treats can be easily adapted for any holiday. For Halloween, decorate them with orange and black sprinkles; for Christmas, use red and green colors.
– School Events: These bites are easy to pack and share, making them perfect for bake sales or classroom treats.
– Family Movie Nights: Serve them as a sweet snack alongside popcorn for a cozy night in. They pair perfectly with a cold glass of milk.
To present your Oreo Bliss Bites in a visually appealing manner, consider arranging them on a decorative platter or in small treat bags tied with a ribbon. This adds a personal touch to your presentation and makes them look even more inviting.
Storage Tips
To ensure your Oreo Bliss Bites stay fresh and delicious, follow these storage guidelines:
– Refrigeration: Store the bites in an airtight container in the refrigerator. They will last up to one week, maintaining their delicious flavor and texture.
– Freezing: For longer preservation, these bites can be frozen. Arrange them in a single layer on a baking sheet and freeze them until solid. Once frozen, transfer them to a freezer-safe container or bag. They can be stored in the freezer for up to three months. When you’re ready to enjoy, simply thaw them in the refrigerator for a few hours before serving.
Conclusion
Oreo Bliss Bites are not only easy to make but also incredibly delicious, making them a perfect treat for any occasion. Whether you’re celebrating a special event or simply indulging in a sweet craving, these bites offer a delightful flavor experience that everyone will love. The combination of creamy filling and rich chocolate coating creates a perfect harmony of taste and texture that’s hard to resist.
We encourage you to try making these delightful bites at home. With simple ingredients and straightforward steps, you can create a treat that’s not only delicious but also brings joy to your family and friends. Sharing homemade desserts is always a wonderful way to connect with loved ones, and these Oreo Bliss Bites are sure to be a hit. Enjoy the process, and happy baking!
